

| We planted all our trees: 3 pear, 3 cherry, 2 apple, and a fig. Fig? Fig. We have yet to stake them, but they're all more or less upright, and we have the stakes. We put up a fence around the garden plot: 150' of green plastic mesh on 3 sides, and the existing boundary fence on the 4th. The mesh is stapled to 5' oak stakes. Lesson #1: Don't skimp on the staples. Lesson #2: Put the fence on the UPWIND side of the stakes. Lesson #3: Wrap the fencing AROUND the end stakes. Lesson #4: Don't put up the ends first, then the middle. The fence WILL sag. Put up one end, and work toward the other, pulling the fencing taut as you go. Lesson #5: It won't stop the deer. It might discourage them a bit, but they'll walk right through. That's why I'm using more staples. I hope they learn to walk around. On Sunday, we opened furrows and dropped in seeds. I did the first 5 by hand, then gave up and Debbie's son, David, brought down the rototiller and re-tilled the rows before I opened the furrow. MUCH easier. Most of the last 2 of 12 rows is our leftover seeds from years past. We put them in THICK, and we don't really expect much to grow. Some of the seeds are 2009! I figure that 1 in 10 might germinate. If anything grows, it's a plus. We are growing lettuce, okra, beans, peas, turnips, parsnips, carrots, salsify, cornsalad, arugula, parsley, tomatoes in beefsteak, roma, and cherry varieties, some peppers, collards, kale, winter squash, butternut squash, buttercup squash, spaghetti squash, pumpkin, and who knows what else. We tried for heirloom varieties this year, but some of the older seeds may have been hybrids. I think we planted the squashes too close together, so if we save seeds and replant, we're going to get some interesting hybrids ourselves. Of course, in a 50'x50' plot, we weren't going to get them far enough apart, no matter what we did. Then we pulled the hoses down from the house, about 300 feet, and put out a sprinkler. It's not much, but it will help. Now I need more hoses to replace them on other parts of the property. This is my third garden. It's about 100x bigger than the first. My success rate has been--disappointing--so far. It's a learning process. |
Monday, April 30, 2012
And The Garden Is IN!
Sunday, April 22, 2012
SUCCESS!
Did I say the parts would soak in the oil for two days? I MUST have meant SIX.
Nothing this week went precisely as hoped.
Tuesday evening, I started mounting the auger on the tractor. The Leinbach L7100Jr model seems to be too big on a Cub Cadet 7275. Or maybe the hydraulic arms just aren't lifting high enough...
Wednesday, I fiddled more with the auger. This is one HEAVY tool. Never did get the thing to rise high enough. Debbie made a suggestion that saved the day--how about an assist? Ratchet and strap webbing, from the end of the boom, over the ROPS, and hooked on...Now that I had it vertical, I was finally able to oil and grease it.
Friday I continued trying to get the auger lifted off the ground. Hydraulic oil level was low, so I added hydraulic oil, but NOW I couldn't get the tractor started. Online to do research...
Saturday, I bled the air out of the fuel lines. Don't forget to open the fuel valve when you run the tractor! It's a nuisance. Then the tractor started right up. The added hydro oil made NO difference at all. I put Debbie's idea to work...

I was worried about the ROPS. It's the roll bar, and I wasn't sure it was going to take the weight. Then I realized that it had BETTER be able to take the static weight of the auger--it was supposed to take the DYNAMIC forces of a ROLLING TRACTOR. It did, just fine.
Suitably jury-rigged, I dug my holes. Attach strap. Lift auger. Move to new hole. Remove strap. Start drilling. Lower hydraulics, auger drills into ground. When deep enough, raise auger (this works fine--it's not too heavy for the hydraulics, it's too long). Stop the drill. Repeat.
Then it was OFF with the auger (I need to come up with a good way to store it...), and ON with the tiller! The PTO coupling has been soaking in old motor oil now for six days, and it's messy. Add grease to both halves of the telescoping shaft, slide them together, and...
Slide them together, and...
Why is nothing ever simple?
Fiddle and push, scrape and slather. Previous experience (see the entry about the crowbar...) has taught me that if it is hard to put on, it will be HARD to get off. More fiddling, and suddenly it's free! It slides in, slides out--it FALLS out, if you let it.
Back the tractor up. Put in the pins. Attach the PTO. THIS time, it's easy. Hook up the top bar. Lift and lower--hydraulics are fine for this. While it is up, engage the PTO and see it spin. Nice and quiet!
And now to till!
First, the raspberry patch.

We had bushhogged a batch of brambles, which we intend to replace with berry-bearing brambles.
Then, the garden!

I tilled our 50x50 space in about 10 minutes. So I went over it again for good measure, UNTIL...
THUNK! Whangity-whang-whang...

I stopped quickly. The top bar had vibrated loose at BOTH ends. The turnbuckle was missing, but easily found on top of the tiller. I took everything off the tractor and reassembled it. I apparently had not adequately engaged the lock nut. I'll remember that.
Finish the tilling, drive into the barn, and head for the showers. It's NICE when things finally WORK.
Tuesday, April 17, 2012
Trees

Now, this is what our property looks like:
You can see, we have a LONG (1/4 mile!), skinny driveway. Based on the markers we've been able to find, and the description of the lot on the deed, we have about 10' by 750' on the west side of the driveway. That's 250 YARDS.
We decided that the best use of that space would be as a linear orchard. That way, we have trees along the drive, and we start growing our own fruit. Since most trees want to be planted about 10 yards apart, we can put in TWENTY FIVE fruit and nut trees.
We ordered our first 9 trees from Miller Nurseries. They include apples, cherries, pears and figs. Figs? Figs.
Now I have to start digging holes--which is why we bought the auger for the tractor. So this evening, I am going to fill the gearbox with oil, put grease in all the joints, and mount it on the tractor. Hopefully, I will be able to dig the holes tomorrow, plant the trees Thursday, and get the auger OFF and the tiller ON the tractor Friday, so we can actually TILL on Saturday.
Plus, I need more peat and compost for the potato barrels--the potato plants are several inches high, and we need to raise the soil level to encourage MORE POTATOES to develop.
Monday, April 16, 2012
TOYS!, Part 2
Getting the bush hog OFF the tractor was almost as hard as I expected. In the end, I used the motorcycle jack to lift the bush hog to where we could find enough slack in the lift arm to get it OFF the lift arm pin. Now I've turned that pin IN, so we have a foot of slack we didn't have before.
It WAS like this:
Then we mounted the tiller.
That is, we TRIED to mount the tiller.
We couldn't get the drive shaft mounted to the PTO. It didn't work.
So, we tried separating the halves of the drive shaft and hooking it up, then sliding the two ends together. It didn't work. The tiller just rolled away from the slowly-backing tractor, and the telescoping part of the shaft, wouldn't. Even after we oiled and greased it some more.
So, we tried to take the drive shaft back OFF the tractor. It didn't work. It was well and truly STUCK.
What to do?
Then, wedge the crowbar between the tractor and the neck of the drive shaft; pull back the collar of the drive shaft; and LEAN HARD into the end of the crow.
I've got about 6" below the fulcrum (the pin for the top bar), and about 30" above it. That means if I put 100 lbs of force into the bar, I should be putting about 500 lbs of force against the neck of the drive shaft.
At first, nothing happened. The CROWBAR was actually visibly flexing. Then, with a PING!, the drive shaft popped off the PTO, right out of my hands. I think it took somewhere between 500 and 1000 lbs of applied force, which I would NOT have been able to get any other way.
At this time, the neck and collar of the PTO are soaking in motor oil. They'll be there at least two more days, because WE GOT OUR TREES.
It WAS like this:
-| |-Now it is like THIS:
|- |-And it may be like this in the future:
|- -|Now, I had previously decided to NOT change the oil in the tiller's gearbox. It was cloudy, but not terribly discolored. Then I ran across a reference to white grease coming out of u-joints, and how this was caused by an emulsion of the oil and water. My oil looked like caramel milk, which didn't seem good. So, I changed the oil. I probably need to replace a gasket somewhere, too. But before I can do that, I need to know what MODEL my tiller is...
Then we mounted the tiller.
That is, we TRIED to mount the tiller.
We couldn't get the drive shaft mounted to the PTO. It didn't work.
So, we tried separating the halves of the drive shaft and hooking it up, then sliding the two ends together. It didn't work. The tiller just rolled away from the slowly-backing tractor, and the telescoping part of the shaft, wouldn't. Even after we oiled and greased it some more.
So, we tried to take the drive shaft back OFF the tractor. It didn't work. It was well and truly STUCK.
What to do?


Then, wedge the crowbar between the tractor and the neck of the drive shaft; pull back the collar of the drive shaft; and LEAN HARD into the end of the crow.
I've got about 6" below the fulcrum (the pin for the top bar), and about 30" above it. That means if I put 100 lbs of force into the bar, I should be putting about 500 lbs of force against the neck of the drive shaft.
At first, nothing happened. The CROWBAR was actually visibly flexing. Then, with a PING!, the drive shaft popped off the PTO, right out of my hands. I think it took somewhere between 500 and 1000 lbs of applied force, which I would NOT have been able to get any other way.
At this time, the neck and collar of the PTO are soaking in motor oil. They'll be there at least two more days, because WE GOT OUR TREES.
Thursday, April 12, 2012
Sadie the Dog

As promised! According to the vet, Sadie's kidney values are the lowest they have ever seen them. She is absolutely normal! Our next follow-up appointment will be in early OCTOBER!
Sunday, April 8, 2012

Happy Easter!
It's been a busy weekend here at Honeyhill...
On Saturday, we got to try out the bush hog, and it WHACKS down weeds and brambles. If you set it too low, it's a pretty good plow. There's a section I scalped so well, I'm thinking we'll just till it and plant flowers.
But it is a BEAR to get it on and off the tractor, and I intend to make some unapproved mods to make that easier--pointing the lift arm pins in the other direction, mostly. They're so wide, I had to take one lift arm OFF to get it in place, and I'll have to reverse that to get it off again.
I started Saturday mowing down the grass around our 2 existing peach trees. We've lived here over 2 years, and have yet to taste a peach! But the Japanese beetle grubs have had a wonderful time! (Well, so has Sadie the dog--she discovered the wonders of fermenting peach juice, and it was all we could do to keep her away from the fallen fruit...) So after mowing the grass about 30 feet in all directions from the trees...
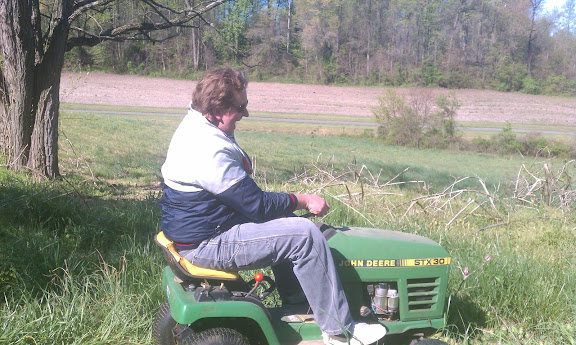
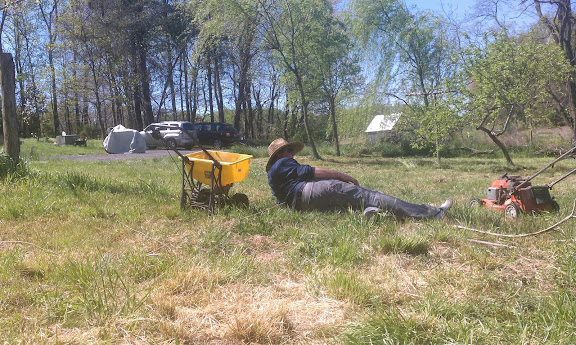
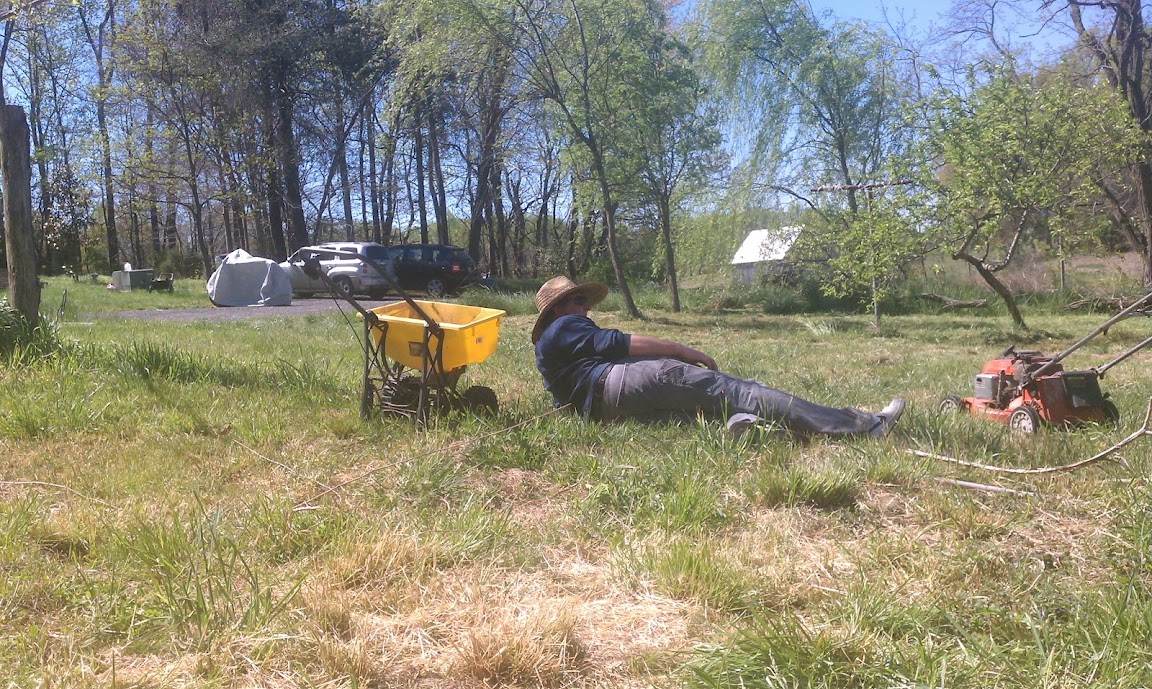
...we spread Milky Spore all around them. Lucky for us, the previous owners had left us both a lawnmower and a drop spreader...but after pushing them around, it was time for a break.
We bought the bush hog and the blade at Marlboro Trading Post, and they were so helpful, we went back and bought a Leinbach L7200 JR auger from them as well.

They even took a look at our "new" tiller, pointed out most of what was wrong with it, and GAVE us a can of ZAP45 spray penetrating oil. In short, it's a hunk of rust, but we might be able to get it to work, they said.
Well, the tiller end of the PTO shaft seems permanently attached. I haven't made any progress on it. But we got the telescoping shaft free (I danced around the yard, waving the freed piece over my head like Beowulf with Grendel's arm), and got the tractor end loosened up, including the bearings INSIDE the PTO connector (get a piece of 1.25"x.25" welding steel, and a hammer. Use your imagination). Soaking the PTO connector in kerosene for 3 or 4 days may have helped...
We greased the u-joints and topped off the oil on the bush hog, then mowed us a patch for our garden. That pretty much finished Saturday.
Easter Sunday began with a beautiful sunrise. Christ has risen!

We attended Easter services, and then went to pick up...
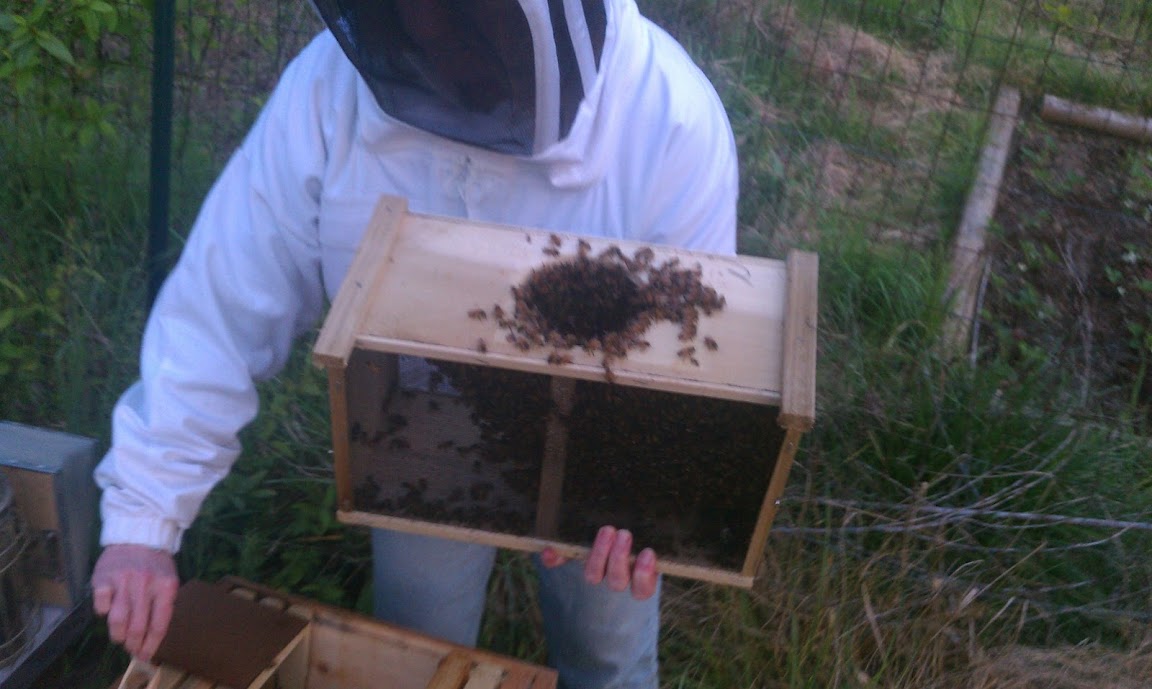
NEW BEES!
This afternoon I reassembled the tiller, greased the PTO, and checked the oil. It's ready to go, I think. Sometime this week, we will have tilled the garden.
Then we installed the new bees. This time, the queen is marked with a white dot, so she'll be easier to find. We have cleaned out the hives, and we're hoping first, to have bees that MAKE SOME HONEY this time, and second, to keep them alive and unpoisoned.

At least one bee went up each of my pant legs. I came back inside to write this blog entry, and at least one came in with me. Now I am experiencing phantom creepy-crawlies. No stings, I think.
And now Debbie is ordering fruit trees. We'll use the auger to make holes to plant them. We're getting more done this year than last--partly because Debbie is feeling so much better, and partly because we have more of the TOOLS we need.
It has been a VERY busy weekend here at Honeyhill.
Tomorrow is Sadie's follow-up appointment with the vet after her kidney failure in October. We'll let you know...
On Saturday, we got to try out the bush hog, and it WHACKS down weeds and brambles. If you set it too low, it's a pretty good plow. There's a section I scalped so well, I'm thinking we'll just till it and plant flowers.
But it is a BEAR to get it on and off the tractor, and I intend to make some unapproved mods to make that easier--pointing the lift arm pins in the other direction, mostly. They're so wide, I had to take one lift arm OFF to get it in place, and I'll have to reverse that to get it off again.
I started Saturday mowing down the grass around our 2 existing peach trees. We've lived here over 2 years, and have yet to taste a peach! But the Japanese beetle grubs have had a wonderful time! (Well, so has Sadie the dog--she discovered the wonders of fermenting peach juice, and it was all we could do to keep her away from the fallen fruit...) So after mowing the grass about 30 feet in all directions from the trees...

...we spread Milky Spore all around them. Lucky for us, the previous owners had left us both a lawnmower and a drop spreader...but after pushing them around, it was time for a break.
We bought the bush hog and the blade at Marlboro Trading Post, and they were so helpful, we went back and bought a Leinbach L7200 JR auger from them as well.

They even took a look at our "new" tiller, pointed out most of what was wrong with it, and GAVE us a can of ZAP45 spray penetrating oil. In short, it's a hunk of rust, but we might be able to get it to work, they said.
Well, the tiller end of the PTO shaft seems permanently attached. I haven't made any progress on it. But we got the telescoping shaft free (I danced around the yard, waving the freed piece over my head like Beowulf with Grendel's arm), and got the tractor end loosened up, including the bearings INSIDE the PTO connector (get a piece of 1.25"x.25" welding steel, and a hammer. Use your imagination). Soaking the PTO connector in kerosene for 3 or 4 days may have helped...
We greased the u-joints and topped off the oil on the bush hog, then mowed us a patch for our garden. That pretty much finished Saturday.
Easter Sunday began with a beautiful sunrise. Christ has risen!

We attended Easter services, and then went to pick up...
NEW BEES!
This afternoon I reassembled the tiller, greased the PTO, and checked the oil. It's ready to go, I think. Sometime this week, we will have tilled the garden.
Then we installed the new bees. This time, the queen is marked with a white dot, so she'll be easier to find. We have cleaned out the hives, and we're hoping first, to have bees that MAKE SOME HONEY this time, and second, to keep them alive and unpoisoned.
At least one bee went up each of my pant legs. I came back inside to write this blog entry, and at least one came in with me. Now I am experiencing phantom creepy-crawlies. No stings, I think.
And now Debbie is ordering fruit trees. We'll use the auger to make holes to plant them. We're getting more done this year than last--partly because Debbie is feeling so much better, and partly because we have more of the TOOLS we need.
It has been a VERY busy weekend here at Honeyhill.
Tomorrow is Sadie's follow-up appointment with the vet after her kidney failure in October. We'll let you know...
Subscribe to:
Posts (Atom)